


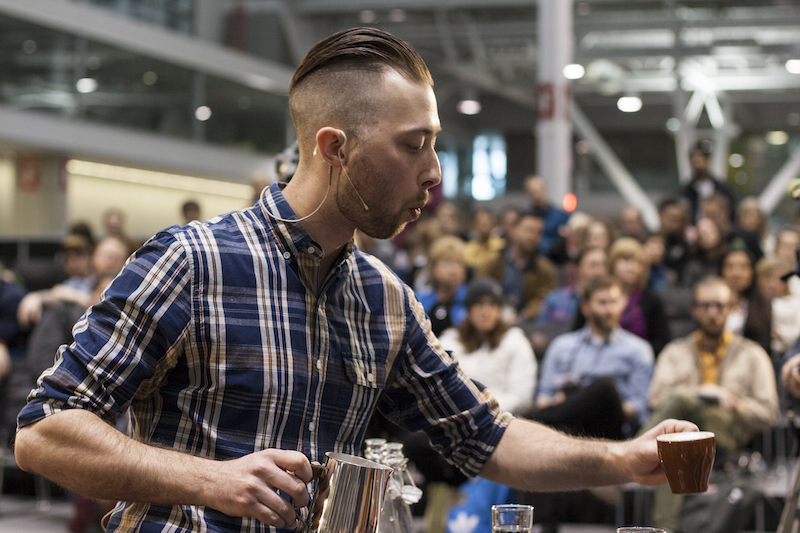
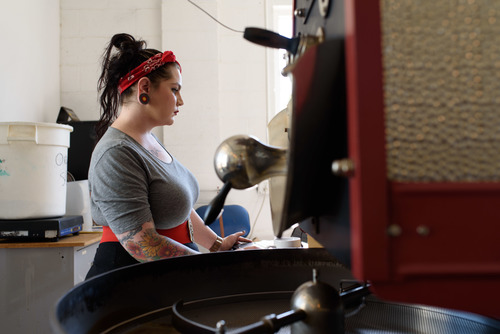
Baristas are relentless.
When it comes to making pour over coffee, a true enthusiast doesn’t settle until they’ve brought out the best flavor the beans can offer.
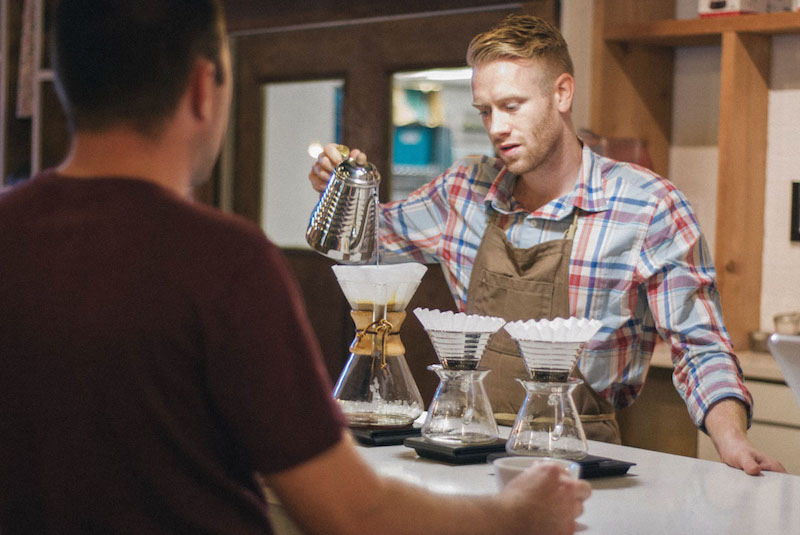
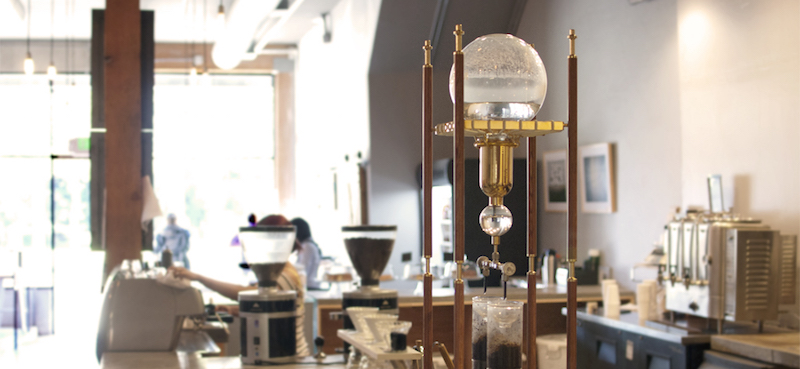
The process starts with something most of us do every morning: brewing a cup of coffee. But for a barista, this is the beginning of an experiment.
A true coffee technician will analyze their pour over, tasting for imperfections and noting areas of improvement. Then they’ll make small and measured adjustments to their recipe and brew again.
And again.
And again, until the coffee is near perfect.
The adjustments baristas make aren’t random. They’re made in accordance to the SCAA’s 7 Pillars of Coffee Preparation, which make up the fundamentals of coffee brewing. They are:
- Brewing method and operation of that method
- Coffee-to-water ratio
- Coffee grind
- Water quality
- Contact time between the coffee and water
- Water temperature
- Filtering
Every tactic coffee professionals employ is designed to optimize one of these 7 pillars. There is some consensus in the industry regarding best practices, such as the need to pre- wet your filter, but other methods are debated or contradicted.
Do you stir the bloom or not? Do you level out your grounds before brewing? What’s the best coffee-to-water ratio for optimal flavor?
The answer is, it depends. The key to utilizing these techniques is finding which ones work best for the coffee you’re brewing.
On our quest to build the best manual coffee grinder, we sought the feedback and advice of a rapidly-growing coffee community called Team Handground. This group, consisting of coffee novices, serious home brewers, and coffee professionals, shares our passion for the continuous improvement of products and of course, the process of making coffee.
As we started the process of developing 3D printed pour over stands, we wanted to learn more about making pour over coffee.
We asked baristas in the community for their best tips to make pour over coffee and the responses we received are amazing. Each barista’s passion for coffee is on display in the 47 tips below.
The tips are categorized into one of 7 pillars so you can choose where to start experimenting. We suggest exploring one new variable at a time to identify which tactics are benefiting your brew and which aren’t.
Note: If you’re looking for some great end-to-end pour over brew guides to get started, check out these resources from our partners at Elemental Coffee Roasters, Caravan Coffee, and Cafe Demitasse.
Pillar #1: Brewing Method and Operation of that Method
1. Test new coffees on multiple brewing devices
“When we get in a new coffee, we look at the origin, elevation, processing method, and roaster's cup-tasting notes to determine where we begin our brew testing. We always seem to start at either Chemex or V60. Africans automatically start at Chemex. Central/South Americans, we go V60.
Once we find a recipe that we enjoy, we analyze the cup with multiple tasters. Usually, this discussion is productive in leading to the 'recommended brew method' for any one coffee, that we then use to sell the coffee."
- Jay Sanders, 392 Caffe, Clinton, IA
2. Brew the same coffee multiple times to adjust the variables
“My advice to people is to make 2-3 brews of the same coffee at the same time with different, appropriate, adjustments to grind size and brew ratio, and then to taste them as they cool.
Exercises like this are essential to generating an understanding of how the variables of coffee brewing are interrelated, and their effect on the taste of a cup of coffee, as well as for developing a palate for tastes and flavors which develop from under or over extraction.
The technique for pourover should be a slow, even pour across the entire bed of coffee, and it should remain as close to the same as possible to allow for some sense of control from brew to brew.”
-Colin Whitcomb, MadCap Coffee, Grand Rapids, MI and Washington, DC
3. Make sure your pourover cone is the appropriate size
“Make sure you’re using the appropriate amount of coffee and water per the size of your pour over. Pour overs come in all shapes and sizes and you don’t want to have an off bed depth when brewing. Too little and the coffee will taste flat and hollow and too much and you lead to a possible over extraction and muddled flavor. There are reasons as to why there are so many sizes, so pick the one that suits the amount of brewed coffee you’re trying to have.”
-Brett Felchner, BARISTA, Portland, OR
4. Try Bonmacs and Hario V60s for a more balanced cup
“We find cone drippers such as the Bonmacs and V60s to produce a more balanced cup between flavor and body with about 70% of the coffees that we try. Most of [our coffees] tend to be in the light/medium roasts.”
-Mike Zhu, New World Coffee House, Raleigh, NC
Pillar #2: Coffee-to-Water Ratio
5. Use a 16:1 Brew Ratio
“Our general ratio is 22g of coffee to 370g of water.”
-Matt Scottoline, ReAnimator Coffee, Philadelphia, PA
6. Or a 17:1 Ratio
“Use a good ratio of water to coffee. We use at 17:1 ratio at our shops [for the Hario v60]. Brewing coffee to be the right strength is awesome.”
- John Johnson, Rising Star Coffee Roasters, Cleveland, OH
7. Or even an 18:1 coffee-to-water ratio
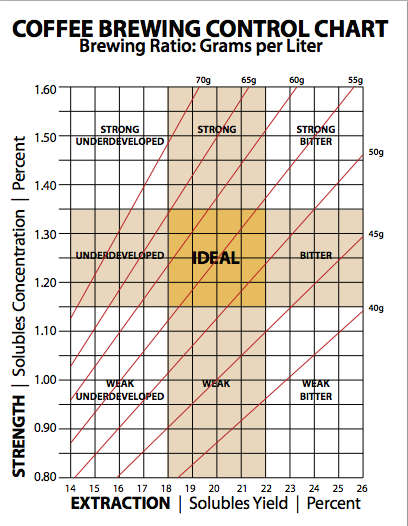
“The 1:18 ratio is pretty specific to my brew method. Thrusting the coffee in a forceful spiral with the last pour, and actually using a finer grind size to boot. It's kind of counterintuitive, but I get a consistent 1.3 TDS, and a consistent 21.67% extraction yield. Upper right hand corner of the optimum balance box in brewing.
This is not necessarily THE ONLY way to get good coffee. Some taste better at 1.25 or 18%. But so far, this consistency has been SUPER sweet, and long lasting. I came back to the peaberry we have after about 3-4 hours and it tasted like sweet juice. Like coffee cherry juice. It was freaking amazing.”
-Tyler Duncan, Topeca Coffee, Tulsa, OK
8. Use a higher coffee-to-water ratio for medium/light roasts than for dark roasts
“I tend to like medium/light roasted coffees ground slightly coarser with a higher coffee to water ratio. 16-1 or 15-1.”
-Mike Zhu, New World Coffee House, Raleigh, NC
9. Use a gram scale
“As far as pourover brewing goes, the biggest tips I can give are to use good quality, freshly ground coffee, and a gram scale to ensure proper ratios of water to coffee.”
- Josh Taves, Novo Coffee, Denver, CO
Pillar #3: Coffee Grind

Brewing great coffee demands a consistent grind, no matter which brewing method you use. Handground was created by a community of thousands of coffee enthusiasts to make it easy to achieve a consistent grind for any brew method.
Click here to learn more about Handground
10. Don’t underestimate the importance of grind size
“It’s my belief the two most important things in making a V60 are the grind size and the control of the flow rate and water distribution. Grind size should be medium-fine, generally speaking, but will vary coffee to coffee as well. The ability for nuanced control over the grind size is probably most important for really dialing in a recipe.”
-Matt Scottoline, ReAnimator Coffee, Philadelphia, PA
11. Grind your coffee beans last
“Grinding should be the last step before commencing the pour, 15 seconds max between grinding and pouring.”
-Jae Ho Synn, Coffeebar Byul, Irvine, CA
12. Look out for a muddy ground bed
“If you ever see the coffee being really muddy at the end it most likely means the grind was too fine or you had too much turbulence in the brewing process and it’ll be over extracted.”
-Jono Moehlig, Land of a Thousand Hills, Atlanta, GA
13. If you have a refractometer, find a grind that yields a 20% extraction
“Ideally, you want a grind size (paired with data from a refractometer) that will allow for an extraction percentage around 20%. With this, the brewer needs to pour in a careful and controlled manner to ensure the brew time is appropriate (between 2:30 - 3:30, depending on the individual coffee and it’s solubility and density).”
-Matt Scottoline, ReAnimator Coffee, Philadelphia, PA
14. Learn to adjust your grind to change the brew time
“It’s important to know how long a brew should take and to adjust your grind accordingly. I feel like it's easy to teach technique and it's easy to verbally say how coarse or fine a grind should be for your method. But if someone's brew is only taking a minute and a half or taking 5 minutes then the extraction will be off.
Obvious, brew times will change from coffee to coffee but on average it should take about 3 minutes for your brew to complete. Learning to adjust your grind based on brew time is a valuable skill!”
-Amanda Byron, Joe Coffee Company, New York, New York
15. Use a lower coffee-to-water ratio (aka more coffee) with a courser grind
“I like using larger grind particles with more coffee because it extracts different flavor profiles than using a finer grind with less coffee. It's a personal preference when comparing the two different methods.”
-Mike Zhu, New World Coffee House, Raleigh, NC
Pillar #4: Water Quality
16. Good water = good coffee
“If your water doesn't taste good, neither will your coffee!”
- Lily Curtis-Harris, Sweet Maria's Green Coffee, Oakland, CA
17. Try using spring water
“Always, always, always use good water, preferably spring water. In our shop we have Reverse Osmosis, which strips the water of everything. Then we add the minerals we want, essentially duplicating spring water mineral content.”
- Jarrett Johnson, Lineage Roasting, Orlando, FL
18. Check out the Soma Filter Carafe
“We recommend the Soma carafes and pitchers. They’re small enough to fit in a fridge, friendly on the wallet, and kinder to the planet than other filtration options. Plus, they’ll get you in the right ballpark for brewing coffee, even if your tap water is pretty out of whack."
- Alex Evans, m5 Espresso Labs, Cincinnati, OH
Pillar #5: Contact time between the coffee and water
19. Use a 1:1 coffee-to-water ratio for the bloom
“No matter what pour over method we're using (v60, chemex, kalita) we always do a 1:1 ratio of coffee-to-water to bloom for 40 seconds. We find that equal parts coffee and water with an appropriate bloom time makes for a rounder, happier cup!”
- Rachel Apple, Elemental Roasters, Oklahoma City, Oklahoma
20. "Bloom the heck out of the coffee" with a 2:1 ratio
“Bloom the heck out of the coffee. We want our baristas to use at least twice the dry coffee weight in water weight when they bloom. And we want them to give the bloom a nice quick stir. Doing this ensure even saturation of the coffee bed with water and increases the likelihood of an even brew.”
- John Johnson, Rising Star Coffee Roasters, Cleveland, OH
21. Keep your grounds off the side of the filter
“Even extraction is critical to making delicious coffee and if part of your grounds are only brewed for the first portion and then stuck to the filter sides, you’ll end up with an off tasting or weak coffee.”
-Brett Felchner, BARISTA, Portland, OR
22. Adjust grind size based on brew time
“I like to tell [my baristas] to keep an eye on the brew time. If it’s taking too long or too short it’s probably time to adjust the grind.”
-Jono Moehlig, Land of a Thousand Hills, Atlanta, GA
23. Stir the bloom
“While pretty much every pour over brew method is designed with flow rate and even extraction in mind, many also rely on an exceptionally controlled pour to achieve an even extraction. A quick stir after the bloom and after you complete your final pour can push what would have been a really uneven brew into balanced sweetness, body, and acidity.”
- Alex Evans, m5 Espresso Labs, Cincinnati, OH
24. DON’T stir the bloom
“We’re not a fan of the stirring bed method. You lose too much complexity. Especially with light roasts, the point is to bring out all those unique notes, not have it lost in order to have more body in the coffee. That’s what the heavier roasts are for.”
-Mike Zhu, New World Coffee House, Raleigh, NC
25. Then again, try stirring the bloom if you’re at a high elevation
“For my V-60 Recipe, I like to stir the bloom in order to ensure saturation and allow 45 seconds for a bloom. We are at a lower atmospheric pressure here in Denver than at Sea Level so the extra bloom time and stirring really help to degas the coffee appropriately.”
-Josh Taves, Novo Coffee, Denver, CO
26. Pour in several small pulses
“A great way to control your flow rate is to pour in short pulses, rather than trying to capture a very thin, steady stream (especially if you don’t have a gooseneck kettle). On our bar at M5, we brew in Kalita 155 brewers and use seven 50g pulses over the course of three to three and a half minutes to brew a ten ounce cup.”
- Alex Evans, m5 Espresso Labs, Cincinnati, OH
27. The fresher the roast, the longer the coffee may need to bloom
“One of the things I tell new baristas is to watch the bloom time. If the coffee is less than a week from roasted, I want it to bloom for an entire minute. After that I like to let it bloom for a minimum of 30 seconds and then keep an eye on it. If i don’t see any bubbles popping or it starts to go down then I know it’s time to start pouring again.”
-Jono Moehlig, Land of a Thousand Hills, Atlanta, GA
28. Pour more slowly with newer coffee, and more aggressively with older coffees
“Pourovers are super super finicky and the brew can always change based on the roast date of the coffee. Due to less bubbling and degassing from an older coffee, they can tend to not self agitate and choke up a bit. I typically say pour slower with new coffees and more aggressively the older it gets to ensure a good, even extraction and soaking of the grounds.”
- Jarrett Johnson, Lineage Roasting, Orlando, FL
29. If you use a Chemex, create a whirlpool as you pour
“The whirlpool does a couple of things:
- It creates agitation, which increases extraction;
- The increased extraction due to the agitation allows us to grind the coffee coarser;
- It reduces the physical labor needed to brew the coffee;
- The whirlpool deposits the coffee on the sides of the filter, which allows a very even washing extraction to occur as the coffee drains;
- It's so much fun.
For a long time, we were brewing the Chemex in the cafes like we would the v60 with concentric circles, but the triple-bonded paper filter is so thick that it would decrease the flow rate significantly and often result in over- extraction. This is just one of many ways that we've tried to brew, and it's my absolute favorite to do at home.”
-Christopher Ryan, Insight Coffee, Sacramento, CA
Check out this brew guide video from Insight Coffee and see the Chemex swirl in action at 1:10.
30. With your Chemex, keep the grounds immersed throughout the brew
“We try to emphasize that the dwell time and brew rate are critical for good coffee. After the bloom, we suggest filling the cone up, immersing all the grounds completely and keeping the grounds immersed throughout the brewing time, stirring the coffee off the bottom in the beginning.
We aim for a 4 minute brew time, so recommend either measuring out the volume of the water beforehand or using a timer/scale such as the Hario. We look for an even distribution of grounds up the cone after brewing as a way to make sure everything worked right.”
- Mark Overly, Kaladi Coffee Roasters, Denver, CO
31. Tap the cone after pouring
“After you've poured all the water, pick up the brewer and give it a good tap. This increases the evenness of the extraction, which will give you more sweetness and complexity in the cup.”
- John Johnson, Rising Star Coffee Roasters, Cleveland, OH
32. Maintain the water line level throughout the brew
“Do pulse pours, maintaining the water line level throughout the brew. This means that all the coffee is in contact with water throughout the brew process.”
-Sandra Loofbourow, Andytown Coffee Roasters, San Francisco, CA
33. Don’t shake the cone to level out the dry coffee grounds before blooming
“If you shake [the cone] to level it, you're actually redistributing the particles. Your fines are more likely to fall through and settle at the bottom, and the boulders are more likely to stay on top.
Regardless of the range of variation in the particle size, there will be dust. By shaking it, that dust settles at the bottom and clogs the pores. This results in a longer brew time, which MIGHT give you a higher extraction yield. Not necessarily a good or bad thing, but it's something we may not have accounted for previously.
So what I suggest is pouring the coffee in as level as possible, and then just leaving it alone. The dust is more likely to attach itself to particles once wetted than to simply stay at the bottom.”
-Tyler Duncan, Topeca Coffee, Tulsa, OK
34. Create a bed of grounds at the bottom of the cone
“You want to create a bed of coffee at the bottom of the cone by pushing the grounds down with your pour and then maintaining a consistent and full bed of water over it. You want those grounds to be settled with an even bed of water passing by them for an even extraction.”
-Brett Felchner, BARISTA, Portland, OR
35. Make a divot in the center of your ground bed before pouring
"I like to create a small divot in the bed of grounds before I brew as I really like to be sure the whole thing becomes saturated throughout the bloom. It also creates a nice entry point for the pour."
-Ozzie Mendoza, PT's Coffee Roasting, Kansas City, MO
Pillar #6: Water temperature
36. Keep your water around 200 degrees
“Water should be between 195F-205F and brewing time should be between 2.5-4 minutes.”
- Josh Taves, Novo Coffee, Denver, CO
37. Heat your container before brewing
“Heat all the glassware with 206F water in advance of any coffee touching it. Cold glassware sucks the heat out of the finished coffee.”
- Jae Ho Synn, Coffeebar Byul, Irvine, CA
38. Also heat your ceramic cone before brewing with it
“Especially in the case of ceramic equipment, you should run hot water over it first. If you don’t, the temperature of the water will drop as the ceramic absorbs the heat of the water. This will result in you brewing at a lower temp.”
- Gary Sawyer, Coffeefusion, Australia
39. Your light roast might need a lower brewing temperature
“Occasionally, light roasts will require a lower brewing temp than 200F to bring out the best in them.
- Mike Zhu, New World Coffee House, Raleigh, NC
40. Cool your coffee before serving
“Before we serve, we pour the brew back & forth between two decanters. We do this to fully distribute the TDS, and to air-cool the brew. We love to serve/drink our coffee at 160-ish degrees.”
- Jay Sanders, 392 Caffe, Clinton, IA
41. Skip the stand… try brewing directly into your cup
“One thing that we do differently is brew directly into the cup, meaning we don't use a stand, or a carafe to brew. The reason why is because for every inch that hot coffee drops, it cools about 5%, and by brewing directly onto the cup, it retains more of the heat. This is even better than using the glass carafe since the carafe's spout which lets heat escape.”
- Aquiles, Flywheel Coffee Roasters, San Francisco
42. If you’re at high altitude, beware of the lower boiling point
“When brewing at high altitudes like here in Denver, water boils at a lower temperature (202F in Denver) so keep your water just off boiling when you begin to brew.”
-Doug Stone, Corvus Coffee, Denver, Colorado
Pillar #7: Filtering
43. Make sure your filter is wrinkle-free
“Pour water to wet the filter so the filter is wrinkle free against the cone, as wrinkles will allow the water a channel past the grounds.”
-Jae Ho Synn, Coffeebar Byul, Irvine, CA
44. Pre-wet your filter
“Our tip is simple: remember to rinse the filter as an un-rinsed filter will produce paper tastes in the final cup.”
- Ben Lehman, CREMA, Nashville, TN
45. Paper filters will create bright, clean, delicate coffee
“When you brew coffee, hot water acts as a solvent, washing the soluble solids out of the coffee grounds and into the brew. Brew methods that use paper filters leave only the soluble solids in the cup, since the paper absorbs the insoluble solids, like oils and superfine particles.
Paper-filtered coffee is ideal for those that prefer a clean, bright, and delicately flavored cup with a range of flavors from the earthier side all the way to acidic and fruity tastes. Insoluble solids in coffee like oils and superfine particles can actually coat the palate and prohibit the perception of acidity in coffee.
For some, a more robust and heavy bodied coffee with less delicate flavors and less acidity is ideal. Brew methods like espresso, French press and Moka pot allow insoluble or suspended solids to enter the brew. Suspended solids can add body and texture to the cup, but can also contribute bitter flavors.”
- Lily Curtis-Harris, Sweet Maria's, Oakland, CA
46. Try an Able Kone
“The Able Kone tends to brew best with gentle agitation. After the bloom, pour gently through the center until about 300 ml of water has been reached. Gently break the crust then return to a slow and steady stream pouring down the middle.”
- Kat Stauffer, Caravan Coffee, Newberg, OR
47. If you’re serving others, do quality control with each cup.
“If a shop owner/barista is reading this, we keep an ounce or two of each brew we prepare to check for quality control, and taste before we serve the coffee. It stimulates enthusiastic conversation with the customer!”
- Jay Sanders, 392 Caffe, Clinton, IA
Final Tips
When refining your pour over technique, remember these key lessons:
- Work within the 7 Pillars of Coffee Preparation.
- Experiment with only one new tactic at a time.
- Be consistent from brew-to-brew to avoid unintended variables affecting the cup.
As you try out these various techniques, an ancient truism captures the process:
“Focus on the journey, not the destination.”
There are a lot of different ways to make a pour over, and this is by no means an exhaustive list. We’d love to hear about other techniques you use to improve your coffee. We will continuously update this article as new and better techniques for making pour over coffee surface within the community.